How to install T-Scan 10 software over a network?
Network installation is an optional feature, which requires an additional licensing fee to run T-Scan™ software on multiple computers linked to a single network database. The network database installation screen, described below, will only be available with software that has the network license. Please contact Tekscan for more information.
SERVER INSTALLATION
Note: For T-Scan Version 10 only! Run the T-Scan setup on the actual server that you want to have host your patient files and install the database.
1. Put software CD into the server’s CD drive or run the software from the provided link. The Installation program opens automatically. Click Install Software
2. Select SQL Server Database and follow the on-screen instructions.
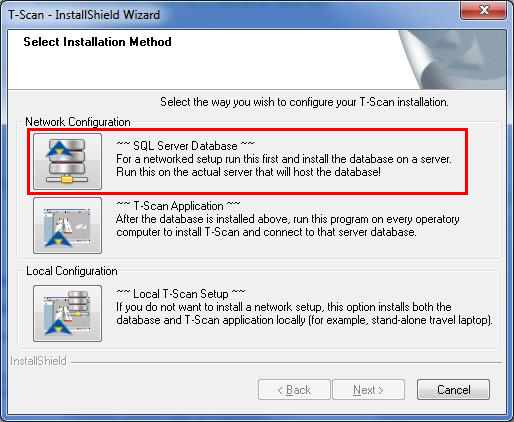
3. Once complete, navigate to the C:\Tekscan folder, select the Scans sub-folder, right click and select Share With. Add Everyone and adjust the Permission Level to Read/Write. For stricter network security, add individual user accounts instead of Everyone. Click Share, and then Done.
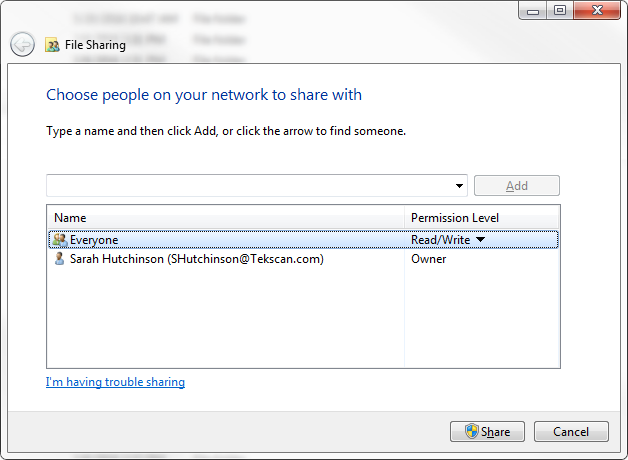
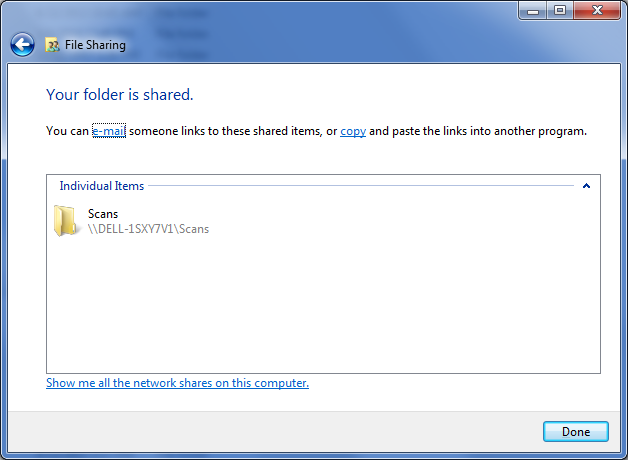
4. You will see a dialog like the one below. Take note of the server path (\\Dell-1SXY7V1\Scans in this example), as it will be critical that you select / enter this path during software installation on each operatory computer.
Note: Your Network Administrator needs to setup static TCP port for TSCAN10 instance, then open the server firewall for that port, in addition to UDP port 1434.
OPERATORY INSTALLATION
5. Go to the computer on which you wish to run T-Scan and run the setup, this time selecting T-Scan Application.
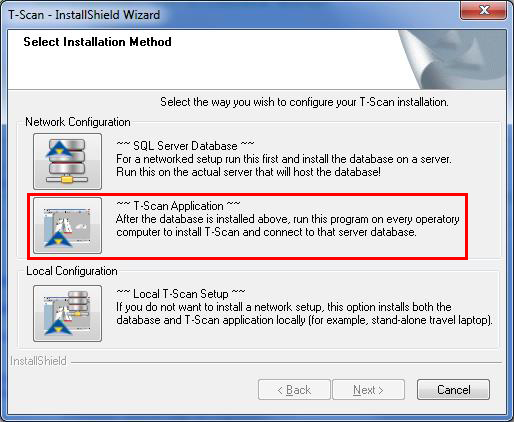
6. Follow the on-screen instructions. When prompted to select the Database Server, click Browse and select the correct SQL Server/Instance name which should have the suffix “TSCAN10.”
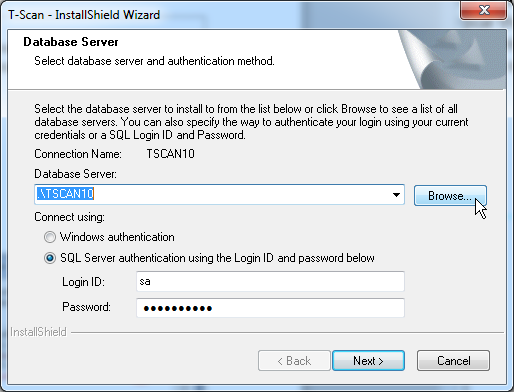
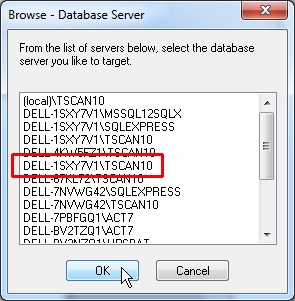
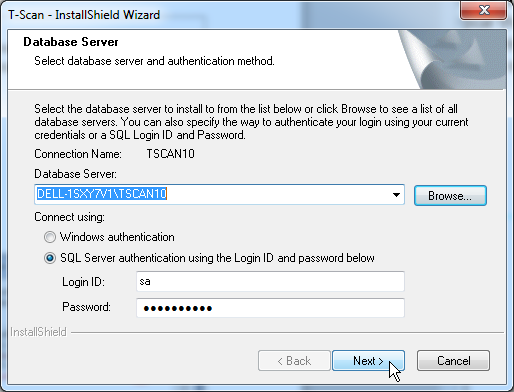
Note: If the TSCAN10 instance is not advertised above, just enter “server name\TSCAN10” and click Next.
7. When prompted to select where to save scans on the network, click Browse (or directly type the path). Point to the network folder you shared on the database server earlier (DELL-1SXY7V1\Scans in this example).
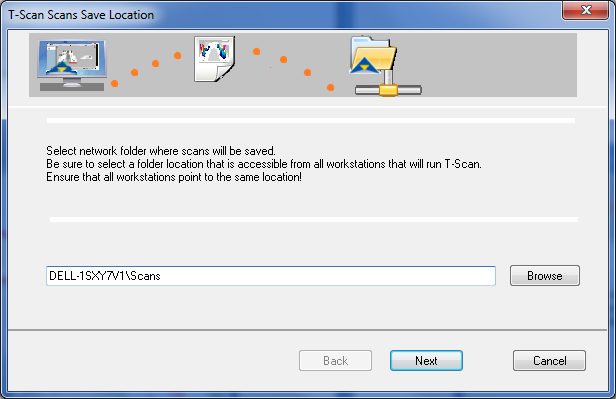
8. Repeat steps 5-7 for additional operatory computers, being sure to point to the correct Scans location on the network. All patient files should be accessible from that point forward.
9. Double check on each operatory by opening the software, going to Help > Technical Support, and ensuring Database Location and Scans Save Folder are both pointing to the correct locations.
Link to this FAQ